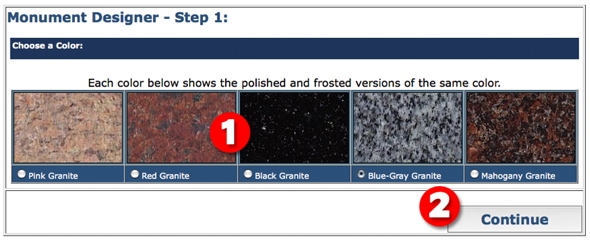
Step 1: Choose a Granite Color

|
Choose a granite color. |

|
Click Continue. |
|
|
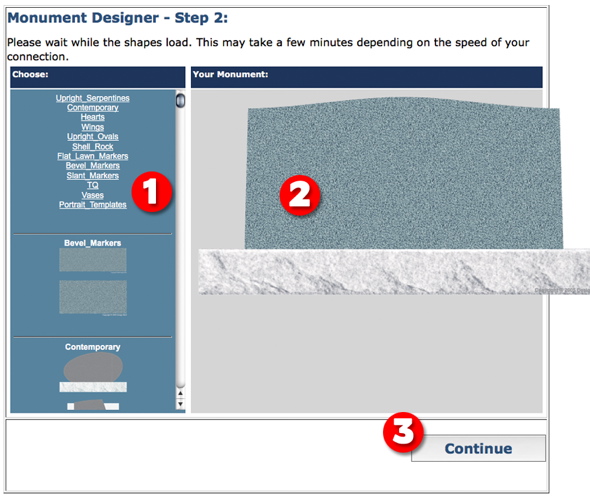
Step 2: Choose a Monument Shape
|
|
Choose a monument shape from the scrolling list. Simply click to select. |
|
|
Your shape will show up to the right when you click on your selection. |

|
Click Continue. |
|
|
Step 3: Add Components

|
|
Scroll through the list of Carving Components. Simply click to select your choice. As you click your carving will show up on the right. |
|
|
Click and drag your carving into the position you choose. You can add as many Carvings as you need. |
|
|
Click Continue. |
|
|
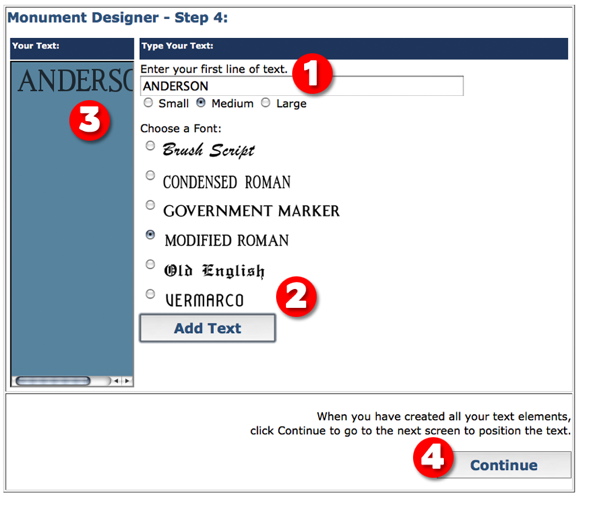
Step 4: Add Your Text
|
|
Enter your Text and choose Small Medium or Large size. |
|
|
Select a font and click Add Text.
|
|
|
As you Add Text it will show up in the list on the left. |

|
When you're finished adding text, click Continue. |
|
|
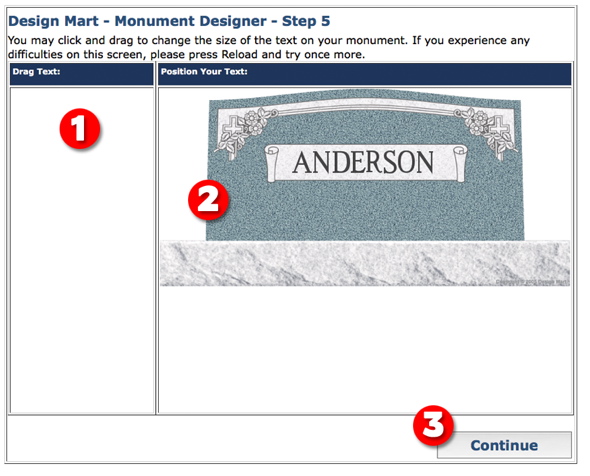
Step 5: Position Your Text
|
|
The text you added in the previous screen will show up here to the left. |
|
|
Click and drag to position your text onto the monument design.
|
|
|
When you're finished positioning your text, click Continue. |
|
|
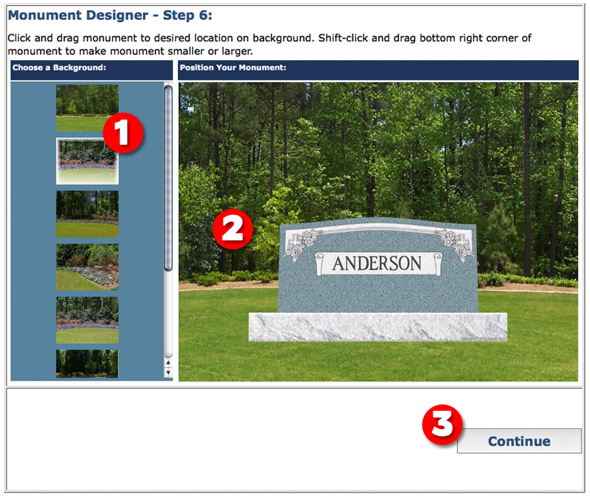
Step 6: Choose a Background
|
|
Choose one of the backgrounds in the scrolling list on the left. Simply click your choice and it will update on the right. |
|
|
You can click and drag your design around and position it where you want on the background. By holding down shift and click-drag in the bottom right corner of the monument shape, you can resize as needed.
|
|
|
When you're finished positioning your design, click Continue. |
|
|
Step 7: Report Summary

|
|
You're almost done. The image here at the top is your finished design. A summary of all your choices will be listed below the design. |
|
|
You may choose a different color for your design.
|
|
|
Simply enter the Client Name or Number and the email address. |
|
|
Click "Email This Summary" to send the email of your design. |
|
|
Get Started Now
When you're ready to get started, simply press the Continue button below.
|